Blog

/blog/

  • 2016-07-07

    UBOS Beta 7: more apps, Raspberry Pi 3, offsite backup, e-mail, AWS and more

    UBOS continues to make great steps forward. In the latest beta, we have added support for more types of hardware to run UBOS on, more apps, important software upgrades, and many small improvements that make your life as owner of a UBOS device in production just so much easier.

    Where do we start?

    • You can now run UBOS natively on Amazon Web Services’ cloud computing platform, EC2. To to so, see details here.

    • The Raspberry Pi Foundation announced the much faster, quad-core Raspberry Pi 3. UBOS supports it, of course, just like on its older siblings Raspberry Pi Zero, One and Two.

    • What do you do if your house burns down or somebody steals your UBOS device with all that valuable data on it? Backups stored outside of the house, that’s what. But traditionally, that’s complicated. With UBOS, it’s not. Here’s what you do:

      % sudo ubos-admin backup-to-amazon-s3
      

      This single command will cleanly back up all the apps on your device, straight to Amazon’s S3 file storage platform. With one more argument, UBOS will first encrypt the backup so nobody can do anything with it unless they have your key.

    • New applications Nextcloud and Mattermost make it even easier to use UBOS for file sharing and group collaboration.

    • Like your website to be encrypted via HTTPS? Setting up such a site is now fully-automated due to an integration between UBOS and Letsencrypt. All you need to do is add --tls --letsencrypt to the ubos-admin createsite command, everything else is automated.

    • Some web applications like to send e-mail. For example, for sign-ups, or password resets, or to notify of comments. Getting e-mail out reliably from behind the firewall, with possibly a hostile internet service provider has never been easy. Until now. With UBOS, you add the amazonses app to any site from which e-mail needs to be sent. UBOS will then automatically route email from that site via the highly reliable Amazon Simple Email Service.

    These are just some of the highlights. The more detailed release notes are here.

    Note: some of these features require you to have an account with Amazon Web Services (AWS), which Amazon might charge you for.

    And as you probably know: to upgrade everything on your device, all you need to say is

    % sudo ubos-admin update
    
  • 2015-12-14

    UBOS Beta 6: now supporting Raspberry Pi Zero, Docker and more

    Hot on the heels of beta 5, here is beta 6 already. It was intended only as a bug fix release, but those bugs got squashed faster than expected, and so UBOS also got a few new features while we were at it.

    Here are the highlights:

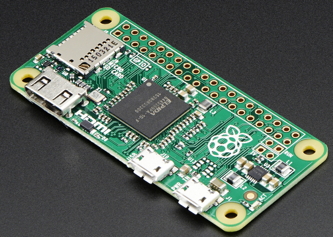
    • It’s hard to believe, but $5 buys you a gigahertz processor, half a gig of RAM, HDMI video and lots of programmable I/O pins; in other words, a Raspberry Pi Zero. We are proud to announce that UBOS now runs on the Raspberry Pi Zero, in addition to the original one and version 2.

    • What else is hot in the computing universe? Docker, of course. And as of now, UBOS also runs on Docker.

    • Want to run web applications at home, but also access them over the internet? The new UBOS network configuration public-gateway lets you set up your UBOS device as a router for your home network, and access your apps on your public IP address. Just say

      % sudo ubos-admin setnetconfig public-gateway
      

      (More info.)

    • And of course the usual: some packages have been upgraded, bugs have been fixed etc.

    And as you probably know: to upgrade everything on your device, all you need to say is:

    % sudo ubos-admin update
    

    The more detailed release notes are here.

  • 2015-12-07

    UBOS Beta 5: single-command firewall configuration, Linux containers etc.

    It’s been longer since beta 4 than we would have liked, but if you work on a big chunk of new functionality, that’s sometimes what happens!

    Now we proudly present: UBOS beta 5. Here are the highlights:

    • In addition to being the primary operating system on a device, UBOS can alternatively now run in Linux containers. Not just on x86_64 PCs, but also on Raspberry Pi’s! So if you already run Linux and don’t want to remove your distro, you can simply run UBOS in addition! To make this easy, we are providing pre-configured images. Here are the instructions for how to run UBOS is a container.

    • Nobody likes setting up networks, particularly complex ones. To make this much simpler, ubos-admin setnetconfig got even more powerful in this release. Using just a single command, it now knows how to setup a home gateway (with masquerading/network address translation, local DNS server, local DHCP server and selective port openings) and a standalone network. It also automatically configures a firewall with what we believe are reasonable, and reasonably secure defaults. For more details, go here.

    • UBOS developer tools have been much improved. They can now be cleanly added to an Arch Linux installation that acts as a development machine. And given that UBOS can run in containers now, development does not need a “target” device in many circumstances. Developer documentation is here.

    • In total, this release contains over 400 package upgrades!

    The more detailed release notes are here.

  • 2015-04-13

    UBOS Beta 4: support for Mediagoblin, Webtrees and PostgreSQL

    We are proud that UBOS beta 4 has been released:

    [PostgreSQL]
    [Webtrees]
    [Mediagoblin]

    There are three major new features:

    1. Mediagoblin, the GNU Project’s photo and media sharing application, now installs, backs up, restores and upgrades with a single command, like all the other apps on UBOS.

    2. Webtrees, a full-featured web genealogy app, allows you to collaborate with your relatives on your ancestors over the internet, without spilling the family secrets to the general public because you keep them on your UBOS device.

    3. As an alternative to MySQL/mariadb, UBOS apps can now use PostgreSQL, and Mediagoblin makes use of that already. Of course, as a user, you don’t have to worry about that because UBOS never makes you touch a database directly.

    In addition, there have been application upgrades, a number of new packages, substantial improvements to the UBOS Staff so you don’t need generate SSH keys yourself, and a number of bug fixes.

    For more details, refer to the release notes.

    How to upgrade

    If you are an existing UBOS user and want to upgrade, log into your UBOS device. First, you might want to make a backup of all your apps installed on your device:

    % sudo ubos-admin backup --out ~/backup.ubos-backup
    

    Then, to upgrade UBOS and all apps on your device, all you need to do is:

    % sudo ubos-admin update
    
  • 2015-04-01

    Raspberry Pi Geek Magazine: UBOS is “clever”

    Raspberry Pi Geek Magazin has a five-page (!) in-depth article on UBOS in its latest 03/2015 issue, calling UBOS “pfiffig” (clever) and “it is a lot of fun.

    In spite of its English-sounding title, the magazine is actually published in German.

    Here are some snippets translated into English:

    Setting up a personal cloud with Ubos

    You Are The Boss

    More and more people would like to keep control over their data. The avenue to your own personal cloud could hardly be any easier than with Ubos -- and that in spite of doing without a graphical user interface. By Ferdinand Thommes.

    README: With UBOS you can set up a small server in a short amount of time and without a lot of upfront knowledge, and run web applications such as ownCloud or Wordpress and others in the browser. You can use an obsolete PC or a Raspberry Pi 2.

    Summary: UBOS convinces through its easy-to-use usage concept. The developers decided against a graphical user interface, and created high-level commands that almost all follow the same pattern and thus can be memorized easily. The system is a lot of fun on the Raspberry Pi 2. All currently available apps run without problems, as they did on the previous models B and B+ of the first version of the small computer. While there sometimes were delays for instances of ownCloud or Wordpress with larger data sets, the new version acts much more fluid with the power of the four cores.

  • 2015-03-18

    User Story: How I set up ownCloud on UBOS with VirtualBox behind a firewall

    UBOS user Emmanual Arthur wrote us with this experience report. You can often find him on #ubos.

    “I wanted to use ownCloud Server, but to set it up on Windows 8.1 wasn’t trivial. So the UBOS solution is more appealing to me. I also wanted to be able to use my ownCloud server if I am out of range of my local network. I didn’t want to use Dropbox, OneDrive, GoogleDrive and such. I also want to sync my calendar, contact and the photo folder on my smartphone with my ownCloud server. I accomplished this without the need to configure everything in Linux and then the ownCloud server.

    My motivation to use UBOS is that I “can use it out of the box”. Either on Rasperry Pi, on PC or on Virtualbox, it is always a quick installation.

    My configuration:

    • UBOS version is Beta 2 yellow (note: should work with any later version in the same way)
    • ownCloud Server version 8.0
    • Oracle VirtualBox version VirtualBox-4.3.24-98716-Win
    • My host for VirtualBox is Windows 8.1

    After setting up UBOS with the guide here, I installed ownCloud with the video tutorial Installing ownCloud 8 on UBOS with TLS.

    When asked for hostname, I chose *. We will need that for connecting from the public internet.

    If you do the same, to use ownCloud on your local network you are done. Just connect to the assigned IP address to your VirtualBox VM running UBOS.

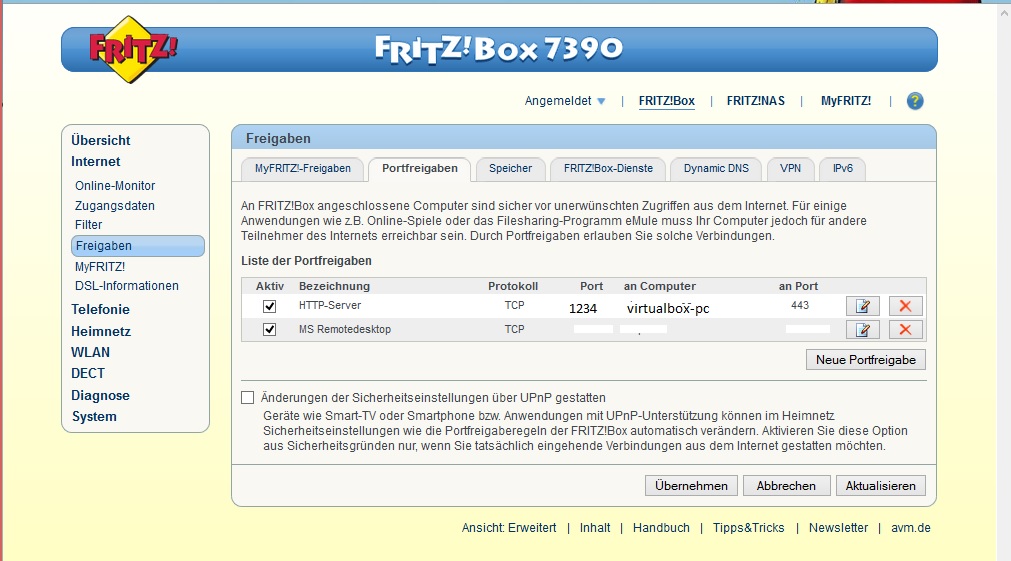
    If you want to connect to your ownCloud Server from a public WiFi or your smartphone, internet cafe etc. you have to configure your home router to portforwarding. ownCloud server over TLS listens on port 443 per default. If your router is also using the port 443 or another device in your local network, you have to reconfigure them to other ports. On your router set the IP address to your VirtualBox to listen on the incoming port like 1234 and redirect it to the port 443. Here is a screen shot from my router:

    You then want to have a dynamic name resolver from e.g. dyndns.org or no-ip.com like yourdnsname.net.

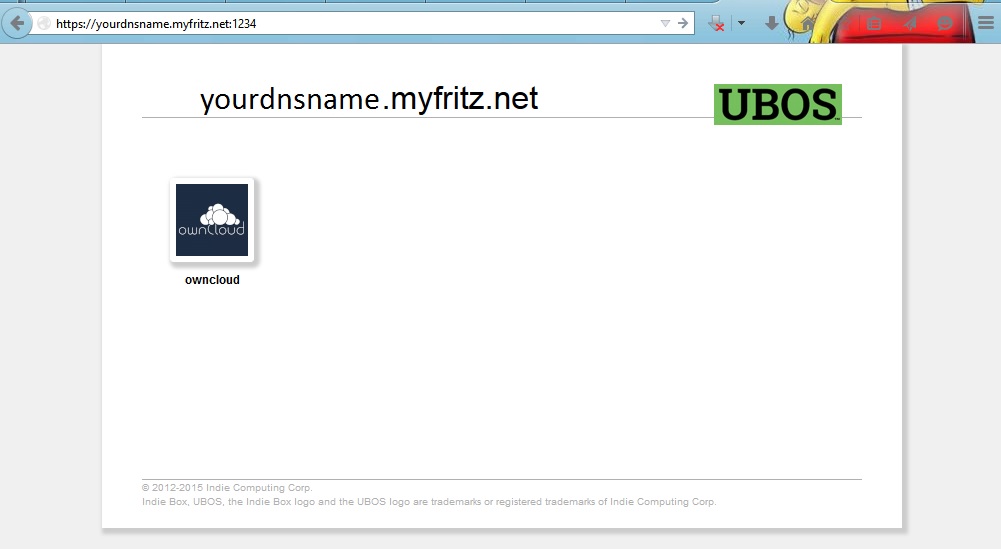
    From public network type https://yourdnsname.net:1234 and you can connect to your ownCloud installation on VirtualBox behind your firewall:

  • 2015-03-14

    How to add an app to an existing site

    Let’s say you have set up a site with one app (e.g. owncloud), as it is described in Setting up your first Site and App. What if you’d like to run a second app at the same site, say selfoss?

    Short version:

    % sudo ubos-admin showsite --siteid <siteid> --json > site.json
    % vi site.json
    % sudo ubos-admin deploy -f site.json
    

    where in the second step, you add a second entry into the appconfigs array with the app you want, the context path where to run, and a unique appconfigid, like this:

    "appconfigs" : [
       {
          "appconfigid" : "ad0f6fd80220f609ebd1f4f7222ed804b5dea10d4",
          "context" : "/owncloud",
          "appid" : "owncloud"
       },
       {
          "appconfigid" : "ad0f6fd80220f609ebd1f4f7222ed804b5dea10d5",
          "context" : "/selfoss",
          "appid" : "selfoss"
       }
    ]
    

    Warning: Do not change the appconfigid of your existing app installation, otherwise UBOS will think you want to delete the old app installation and all its data, and create a new one from scratch.

    Long version:

    Of course, you could use sudo ubos-admin createsite to run the second app at a second site, but that would mean you would need to use a second hostname. Sometimes that is useful: for example, Jack and Jill, who use the same box running UBOS, could have their separate sites jack.example.com and jill.example.com on the same box, with different (or the same!) applications installed while keeping their data separate. But that requires DNS configuration so the hostname resolves correctly, is more complicated to set up, and doesn’t make much sense for a single user.

    Instead, let’s add a second app to the existing site. First, we look at what’s installed on our device already. (This is an example, depending on what you have installed, what you see may be different.)

    % ubos-admin listsites
    Site: * (s1bdfd3ea4bba1b5615a74db7991d839a2eecfc2c)
        Context:           /owncloud (ad0f6fd80220f609ebd1f4f7222ed804b5dea10d4): owncloud
    

    We see that we currently have one site at the wildcard hostname, i.e. it responds whichever way it was reached from the browser, such as http://ubos-pc.local/ or http://10.0.3.15/. We also see that app owncloud is currently installed at context /owncloud.

    Let’s try this out: if we go to http://10.0.3.15/, we see this screen:
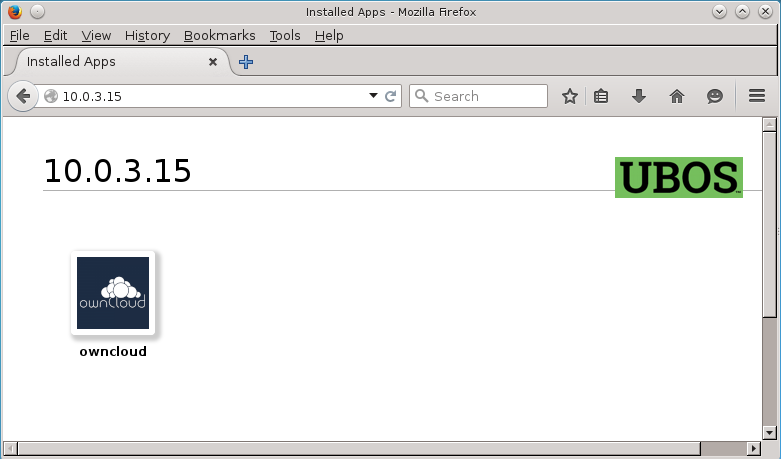
    That’s right: the site responds to the entered IP address, and it shows a single icon for the single app that’s installed (owncloud). If we hover the mouse over the icon, we can see it is accessible at http://10.0.3.15/owncloud, per the context field above.

    What we really want to do is add a second icon to that screen which leads to a second app.

    UBOS doesn’t currently have a nice command for doing this. (See bug report – want to help?) But editing the Site JSON itself it isn’t that hard either. Do this:

    % sudo ubos-admin showsite --siteid s... --json > site.json
    

    This command “shows the site”, in “–json” format, but instead of printing it to the terminal, saves it to a file in the current directory called site.json. This is your site’s Site JSON file, which contains your site’s complete configuration. (When you said sudo ubos-admin createsite when you created the site, all you really did is create that file.)

    Let’s edit this file. Use your choice of editor, like vi, or copy the file from your UBOS box to a PC where you have an editor you like. Just make sure that you keep the file a pure text file, and don’t accidentally convert it to Word or rich text, or such!

    One caveat: if your site is an SSL site, you cannot use vi to edit the Site JSON because it cannot handle the very long lines from the certificate. UBOS currently doesn’t include an editor that can (see bug report), so you need to edit the file on some other box. Sorry about that: beta4 will include vim.

    Look for the section named appconfigs: it lists all the apps currently installed at the site. If you are not familiar with JSON: right after the colon after appconfigs, the section starts with a [ and ends some lines down with a ]. In between, right now, there is one entry that starts with { and ends with }. It may look like this:

    {
       "appconfigid" : "ad0f6fd80220f609ebd1f4f7222ed804b5dea10d4",
       "context" : "/owncloud",
       "appid" : "owncloud"
    }
    

    It basically says “there is an app with an identifier owncloud and it runs at context /owncloud. You will recognize these values from what you typed into ubos-admin createsite. It also has a long, basically random number as identifier. Now we add another section, so the entire appconfigs section looks like this:

    {
       "appconfigid" : "ad0f6fd80220f609ebd1f4f7222ed804b5dea10d4",
       "context" : "/owncloud",
       "appid" : "owncloud"
    },
    {
       "appconfigid" : "ad0f6fd80220f609ebd1f4f7222ed804b5dea10d5",
       "context" : "/selfoss",
       "appid" : "selfoss"
    }
    

    Note there is a comma between the two sections, and note that the appconfigid in the second section must be different from the first. You can make the second appconfigid any identifier you want, as long as it is unique. The context also needs to be different, so the apps respond to different URLs.

    Warning: Do not change the appconfigid of your existing app installation, otherwise UBOS will think you want to delete the old app installation and all its data, and create a new one from scratch.

    Now save the file back, and run:

    % sudo ubos-admin deploy -f site.json
    

    This takes a little bit for installation. Then, refresh your web browser. Voila, here we are:
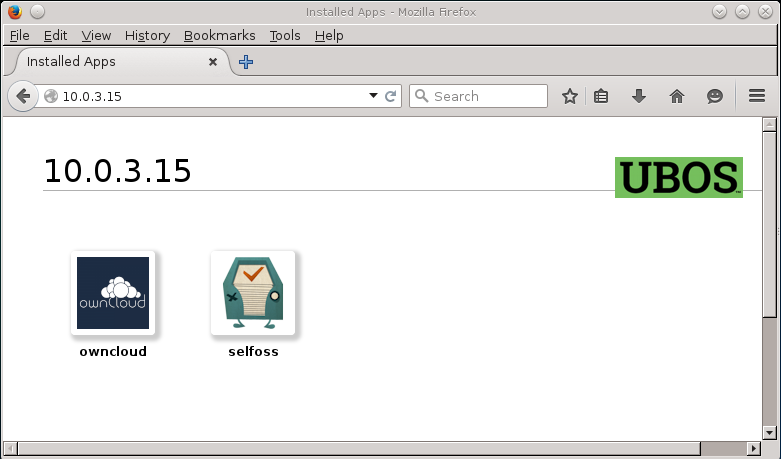
    Note that you can use the same approach to make other kinds of changes to your site. Simple export the Site JSON with ubos-admin showsite as above, make the changes you want to see, and redeploy with ubos-admin deploy.

  • 2015-03-13

    UBOS Beta 3 is out: added Raspberry Pi 2, Beagle Bone Black, and the UBOS Staff

    We are proud that UBOS beta 3 has been released this morning.

    [PC]
    [Virtual Box]
    [Raspberry Pi]
    [Beagle Bone Black]

    There are two major new features:

    1. UBOS now also supports the quad-core Raspberry Pi 2, and the Beagle Bone Black. These two new platforms join the original Raspberry Pi and the x86 (64bit) platform for physical and virtualized computers, for more options to run UBOS.

    2. The UBOS Staff makes secure configuration of UBOS devices without keyboard and monitor a snap. See blog post and documentation.

    For more details, refer to the release notes.

    How to upgrade

    If you are an existing UBOS user and want to upgrade, log into your UBOS device. First, you might want to make a backup of your sites:

    % sudo ubos-admin backup --out ~/backup-$(date +%Y%m%d%H%M).ubos-backup
    

    Then, to upgrade UBOS and all apps on your device, all you need to do is:

    % sudo ubos-admin update
    
  • 2015-03-03

    Meetup on Monday, March 9

    The next UBOS / Indie Box meetup is going to be on Monday, March 9, 6:30pm, at the Hacker Dojo, in Mountain View, CA.

    Register here.

    Can’t come? Meet us on IRC at #ubos on freenode any time.